- Merchandise Shop
- Where to Buy
-

 English


 English
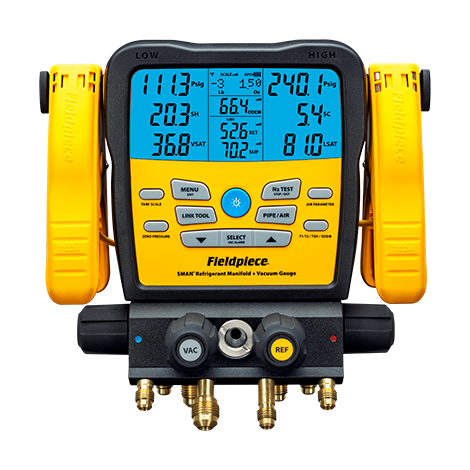

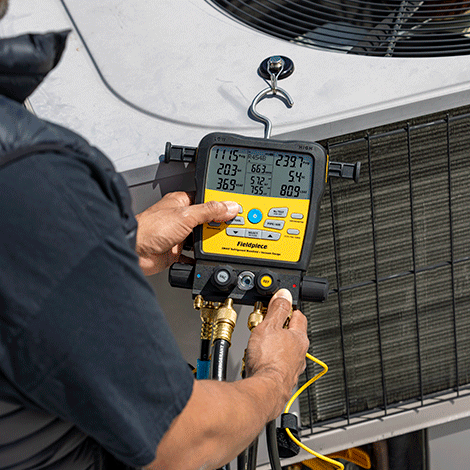


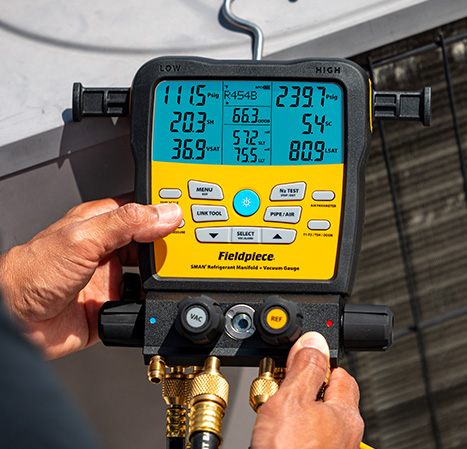
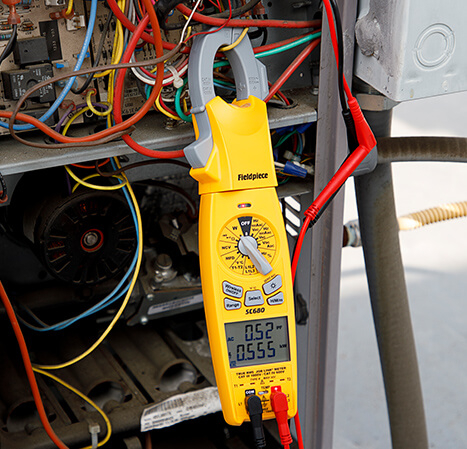
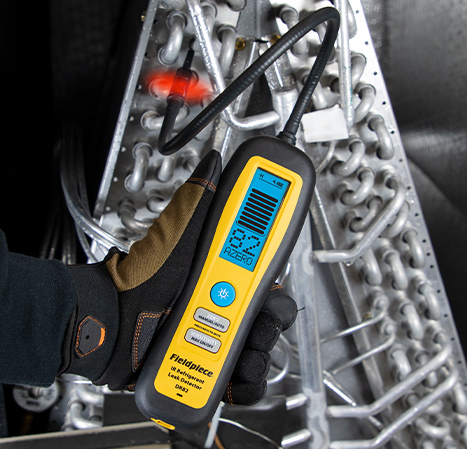
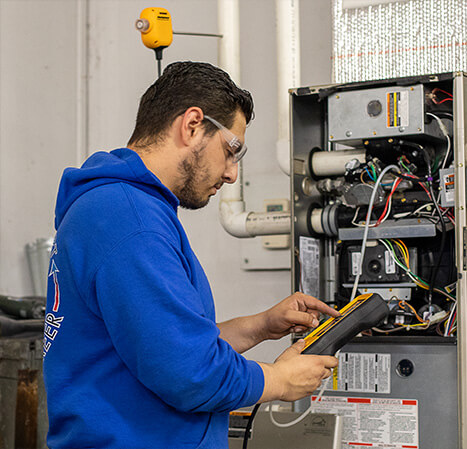
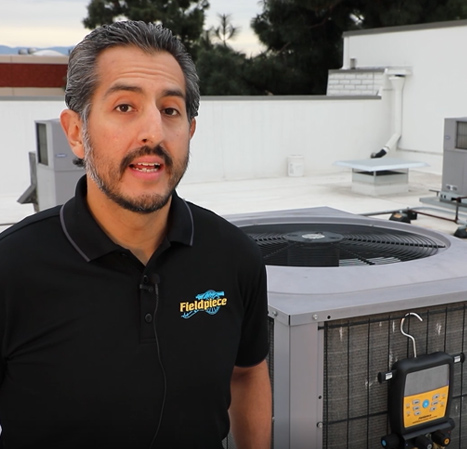
Your HVACR Command Central.
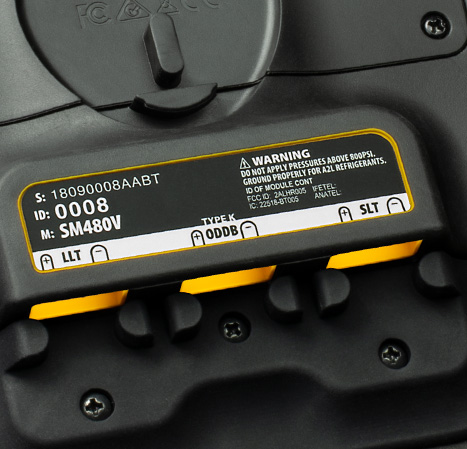
Supports over 70 refrigerants
A2L Compatible
Features an integrated vacuum gauge
3/8″ Vacuum port and block for fast evacuations
Logs hours of data
Runs a temperature compensated nitrogen pressure test
Displays in 12 languages
Serves as a central data hub for Job Link® wireless tools and connects to the Job Link® system app
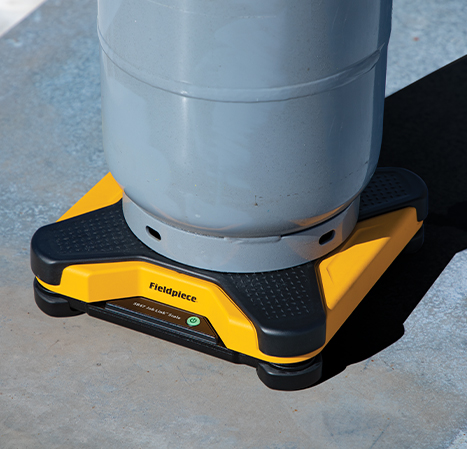
Dust and water resistant (IP55)
Designed for Performance
Knowledge, power and experience are packed into the SMAN® Refrigerant 4-valve Manifolds. Years of feedback from A/C and refrigeration specialists is combined with Fieldpiece’s laser focus on continuous improvement to bring you the toughest, most advanced digital refrigerant manifold on the market.
With wireless capabilities, data logging, and tightness testing, the SM482V is built so you can do your job easier, faster and better.
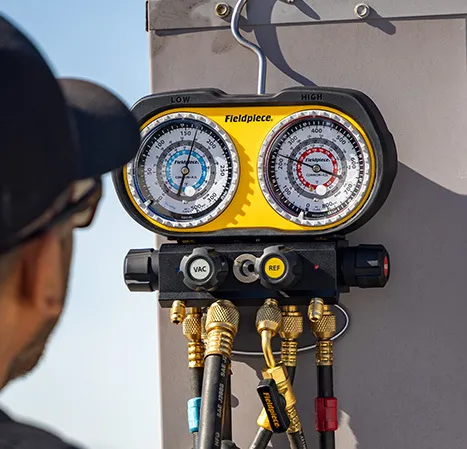
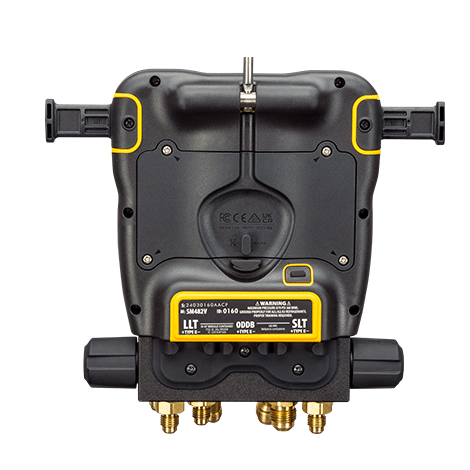
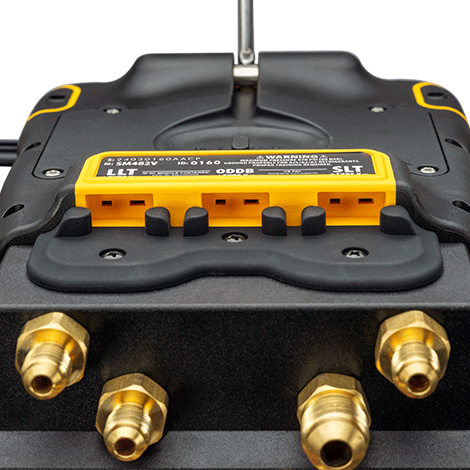
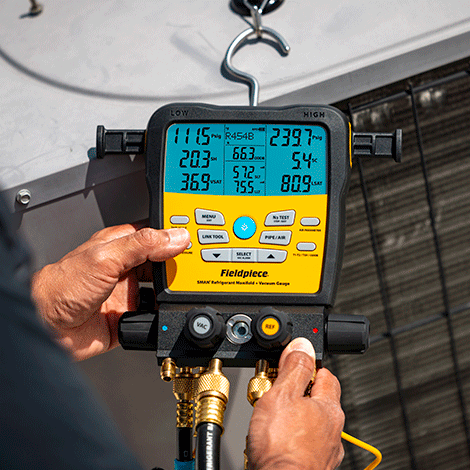
Simply Strong
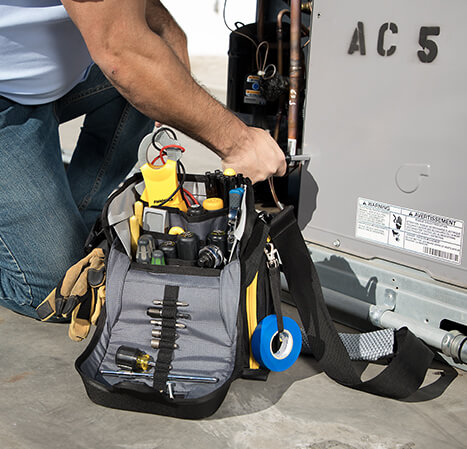
The SM482V 4-valve Manifold is simply strong. The heavy-duty casing, reinforced hook, IP55 dust and water resistance, impact resistant screen, protected thermocouple jacks, and hermetically sealed sight glass, all ensure the SMANs are ready to go to work.
Packed with Knowledge
The SM482V is designed to work the way you do with advanced features to streamline your job and provide the answers you need.
Measures
• Line pressures, pipe temperatures, dry bulb temperature and system vacuum
Calculates
• Superheat, subcooling, vapor saturation, liquid saturation and delta T
• Live target delta T and target evaporator exit temperature with optional Job Link wireless tools
• Temperature-compensated pressure differential for nitrogen pressure testing
Data Logs
• Stores up to 9 jobs internally
• Logs up to 168 continuous hours
Is Customizable
• Select the measurements to display
• Select wireless ON/OFF
• Set high and low vacuum alarms
Part of the Job Link® System of Wireless Tools
Add Job Link® System wireless tools to your arsenal and get live readings directly on the SMAN® manifold screen from the Job Link Psychrometers (JL3RH), Job Link Pipe Clamps (JL3PC), and SR47 Refrigerant Scale. Place pipe clamps in the perfect location. View live air measurements and calculations while making adjustments. Monitor and record refrigerant weight for precise recovery and charging documentation.
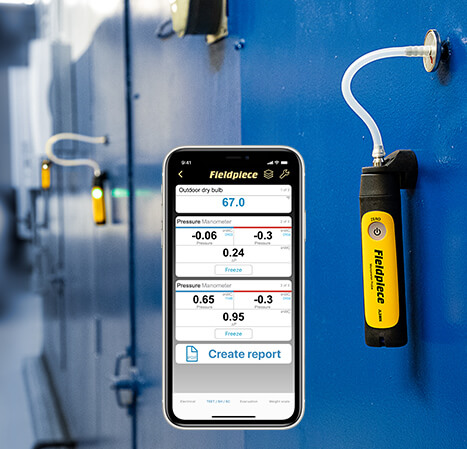
Increase Professionalism with Job Link® System App
Streamline and simplify your call even further with the Job Link System App. See your measurements up to 1000’ away on your mobile device. Document your work and provide professional reports, including refrigerant recovery and charge weight, by simply connecting to the Job Link System app.
Includes:
• SM482V 4-Port Manifold
• (2) TC24 Wired Type-K Pipe Clamp Thermocouple
• (1) ATA1 Type-K Bead Thermocouple with Clip
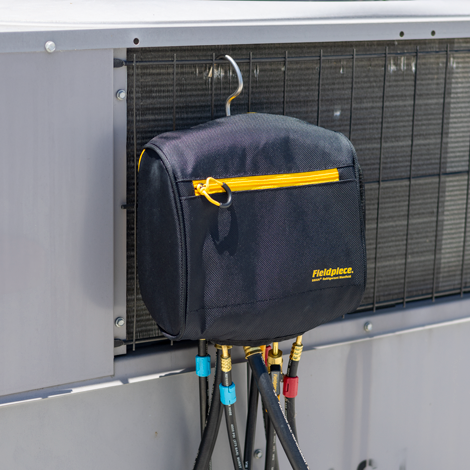
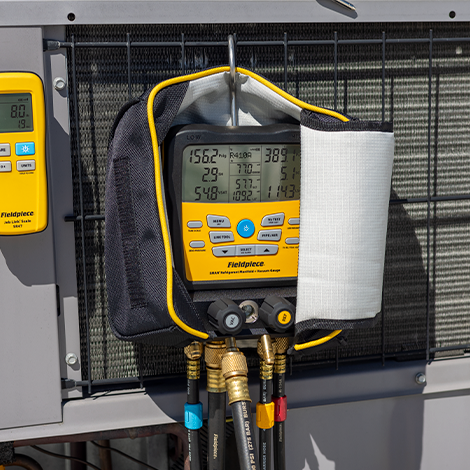
• (1) ANC82 Easy-Open, Padded Case
• (6) AA Alkaline Batteries
• (1) Operator’s Manual
Read More
Your HVACR Command Central.
Supports over 70 refrigerants
A2L Compatible
Features an integrated vacuum gauge
3/8″ Vacuum port and block for fast evacuations
Logs hours of data
Runs a temperature compensated nitrogen pressure test
Displays in 12 languages
Serves as a central data hub for Job Link® wireless tools and connects to the Job Link® system app
Dust and water resistant (IP55)
Designed for Performance
Knowledge, power and experience are packed into the SMAN® Refrigerant 4-valve Manifolds. Years of feedback from A/C and refrigeration specialists is combined with Fieldpiece’s laser focus on continuous improvement to bring you the toughest, most advanced digital refrigerant manifold on the market.
With wireless capabilities, data logging, and tightness testing, the SM482V is built so you can do your job easier, faster and better.
Simply Strong
The SM482V 4-valve Manifold is simply strong. The heavy-duty casing, reinforced hook, IP55 dust and water resistance, impact resistant screen, protected thermocouple jacks, and hermetically sealed sight glass, all ensure the SMANs are ready to go to work.
Packed with Knowledge
The SM482V is designed to work the way you do with advanced features to streamline your job and provide the answers you need.
Measures
• Line pressures, pipe temperatures, dry bulb temperature and system vacuum
Calculates
• Superheat, subcooling, vapor saturation, liquid saturation and delta T
• Live target delta T and target evaporator exit temperature with optional Job Link wireless tools
• Temperature-compensated pressure differential for nitrogen pressure testing
Data Logs
• Stores up to 9 jobs internally
• Logs up to 168 continuous hours
Is Customizable
• Select the measurements to display
• Select wireless ON/OFF
• Set high and low vacuum alarms
Part of the Job Link® System of Wireless Tools
Add Job Link® System wireless tools to your arsenal and get live readings directly on the SMAN® manifold screen from the Job Link Psychrometers (JL3RH), Job Link Pipe Clamps (JL3PC), and SR47 Refrigerant Scale. Place pipe clamps in the perfect location. View live air measurements and calculations while making adjustments. Monitor and record refrigerant weight for precise recovery and charging documentation.
Increase Professionalism with Job Link® System App
Streamline and simplify your call even further with the Job Link System App. See your measurements up to 1000’ away on your mobile device. Document your work and provide professional reports, including refrigerant recovery and charge weight, by simply connecting to the Job Link System app.
Includes:
• SM482V 4-Port Manifold
• (2) TC24 Wired Type-K Pipe Clamp Thermocouple
• (1) ATA1 Type-K Bead Thermocouple with Clip
• (1) ANC82 Easy-Open, Padded Case
• (6) AA Alkaline Batteries
• (1) Operator’s Manual
Specifications
-The following are available spare & replacement parts for the SM382V & SM482V:
| P/N | Description | SM382V | SM482V |
| RSM82E | SMx82V Clamp Ear Replacement Kit | X | X |
| RSM82H | SMx82V Hose Holder Replacement Kit – 1/4″ + 5/16″ | X | X |
| RSMANK6 | SMAN 2/3 Valve and knob kit | X | |
| RSMANK8 | SMAN 4X Valve & knob kit | X | |
| ANC82 | SMAN® Refrigerant Manifold Side Seal Soft Case | X | X |
The RSM82H includes: (3) short ¼” hose holders, (1) long ¼” hose holder, (1) 3/8” vacuum hose holder, & (2) short 5/16” hose holders – enough to fully configure either the SM382V or SM482V.
The RSM82E includes: (2) replacement clamp ears (right and left) & (2) replacement clamp ear blank offs (right and left).
All of our products have a 1-year warranty from date of purchase.
A number of effects may be affecting the vacuum pressure reading immediately after closing the VAC valve (on a 4-port manifold) and turning off the vacuum pump
• Vacuum pressure is equalizing across the system from the manifold vacuum sensor to the farthest point from the vacuum sensor.
• Dissolved moisture or refrigerant are outgassing from the compressor oil or other areas of the system
• There is a small leak somewhere downstream from the vacuum sensor in the manifold. This may be in the manifold, hose connections, or HVAC system.
You have isolated the micron gauge from the system, you are now only reading what is inside your manifold and the hose to the vacuum pump.
When comparing your integrated vacuum sensor in your manifold to an external vacuum gauge, you may see a difference in the measurement. Each vacuum sensor (internal or external gauge) will have some accuracy tolerance. Additionally, depending on the location of each vacuum sensor relative to the vacuum pump, the observed vacuum pressures may be different. After taking these into account, check the following:
• The vacuum sensor is dirty – Clean sensor periodically with isopropyl alcohol
• The manifold block has trapped non-condensables – Flush & clean the manifold block
• The attached hoses are dirty – Flush & clean the hoses
• From the main screen, press the MENU button, use the arrow buttons to navigate to the TOOL SET menu option, press the SELECT button
• Use the arrow buttons to navigate to the Return option for IDWB or Outdoor option for ODDB.
• Press the SELECT button.
• Use the arrow buttons to select “Manual” for manual entry and press the SELECT button.
• Use the arrow buttons to adjust the set temperature by 0.1 degree increments and press SELECT to lock in the desired setting. The SMAN will return to the main screen.
Visit http://www.fieldpiece.com/support/downloads to download the latest firmware for your SMAN product. After downloading the firmware update, run the .exe file and follow the instructions on your PC.
• Verify you have the correct refrigerant selected.
• Verify you have the Low side hose connected to the Suction line and High side hose connected to the Liquid line.
• Verify you have the correct pipe clamps (SLT & LLT) connected to the correct system pipes.
• You may have a negative degree of superheat or subcooling.
To verify Subcooling is calculating properly:
• Plug in thermocouple into LLT port and change refrigerant to R113. Verify the manifold calculates a correct subcooling value at the indicated LLT.
Superheat is not working-
• Plug in thermocouple into SLT port and change refrigerant to R407F. Verify the manifold calculates a correct superheat value at the indicated SLT.
Over time, the vacuum sensor of the SMAN may become contaminated with dirt, oil, and other contaminants. If you are frequently flowing refrigerant through the manifold and exposing the vacuum sensor to this flow, we recommend that users should flush or clean their manifold every 2 to 4 weeks to extend the life of the SMAN by avoiding contaminants from building up on the sensor components.
• Using an Ice bath approximately 70% ice 30% water, place the pipe clamp in the ice water and stir for approx. 15-20 seconds.
• Press the MENU button and toggle with the arrow buttons to the “CalTemp” option and press the SELECT button.
• Use the arrow buttons to select the desired temperature to calibration and press the SELECT button.
• The selected temperature value will flash on the screen, use the arrow buttons to adjust the temperature to match 32.0 °F (0.0 C).
• Press the SELECT button to save the updated value and return to the list of temperatures.
• Repeat this process for any additional clamps that require calibration or press the MENU button to return to the main screen.
When charging a system, recovering or discharging your hoses, ESD (electrostatic discharge) is created and can give out enough electricity to shock you. Proper grounding will avoid this issue.
The Advanced Pressure Calibration procedure is detailed in the SM382V and SM482V user manual.
Automated Linking:
• From the main screen, press the LINK TOOL button.
• When prompted with “Search?” select YES and press the SELECT button.
• The SMAN will detect and display the available JL3RH tools for linking. Use the up and down arrow buttons until the desired “ID-####” is displayed with the ODDB measurement.
• Press the SELECT button. The SMAN will display “Linked” and return to the main screen.
Manual Linking:
• From the main screen, press the MENU button, use the arrow buttons to navigate to the TOOL SET menu option, press the SELECT button
• Use the arrow buttons to navigate to the “Outdoor” option for ODDB.
• Press the SELECT button.
• Use the arrow buttons to select the desired “ID-####” for the JL3RH.
• Press the SELECT button. The SMAN will display “Linked” and return to the main screen.


