Categories
Tech Articles

Want to Find Refrigerant Leaks? Pick up a Good Refrigerant Leak Detector.

HOW REFRIGERANT LEAK DETECTORS WORK

They can now sniff out even the smallest leaks.

Leak detection technology continues to evolve, and new tools are more and more sensitive – capable of finding leaks as small as 1 gram of refrigerant a year. Before diving into what you should look for in a detector, let’s start by talking about what detectors look for. A refrigerant leak detector helps technicians pinpoint leaks in a system. These leaks often happen at miniscule defects in a pipe or fitting. Most imperfections are far too small to see, but gas still escapes through them. Once a leak is found, a decision needs to be made: Can it be repaired? Or should the leaking component be replaced?

Where leaks play hide-and-seek.

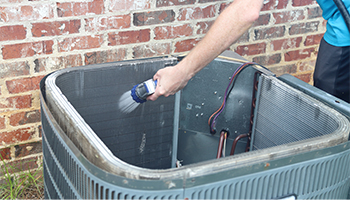
Once you have determined that your system is losing refrigerant, you need to find where it’s leaking from. The first tools you can use are your eyes and ears. Start by searching for oil stains or listening for pinhole leaks near weld joints or other connections. For both of these options, you need a well-lit and quiet environment, but that’s rarely the case. Leaks are usually located at Schrader valves, pressure relief valves, soldered joints, threaded fittings, dissimilar metal joints (like copper to aluminum) and valves. If you can’t hear or see anything obvious, it’s time to try another leak detection method like soap bubbles, UV dyes or electronic detectors.

Gas can be blown around.

Isolating the exact location of a leak is difficult since refrigerant leaks are easily affected by other factors. If there are small drafts in the room, temperature swings or even people moving around a lot, those can all affect the flow of air and gas. Also, gas dilutes in the air and can be difficult to discover far from the leak. Refrigerant gas flows downward as it vaporizes and settles. Gas concentration is more erratic the further it is away from the source. That’s why leak detection requires great patience and deliberate, methodical searching.

Soap bubbles and UV dyes can be messy.

Soap bubbles have been used to discover or detect leaks on pipes and fittings for generations. By placing a small amount of liquid soap on a fitting, small bubbles appear if the gas tries to escape through a large enough leak; however, smaller leaks are difficult to find using this method. Plus, this technique creates a mess. UV dyes can also help spot a leak. Place a small amount of UV dye in the system and let it circulate. Then, scan the system with a UV light. Leaks will show as bright spots and are easy to see. Both of these approaches have drawbacks since you need to be able to see the leak to locate it – and in some systems, seeing every side of every fitting is impossible.

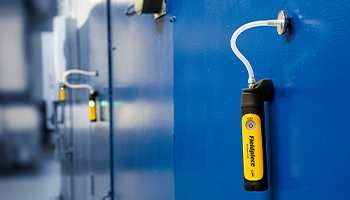
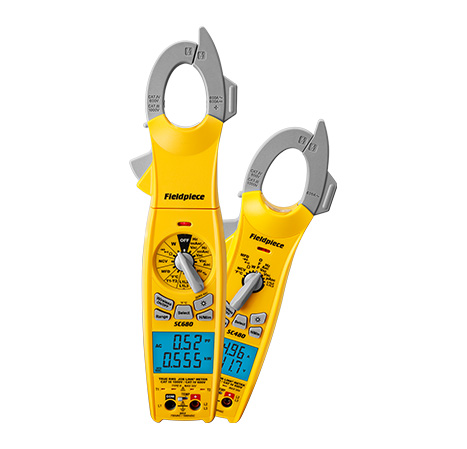
Electronic detectors can see everywhere.

The newest refrigerant leak detectors on the market use infrared (IR) or heated diode sensors to find leaks. They aren’t messy like bubbles or UV dyes, and they can immediately sniff out the presence of refrigerant. You no longer need to see the leak to find it, and new advances in technology have made them extremely sensitive to even the smallest leaks.

REFRIGERANT LEAK DETECTOR PAIN POINTS

They’re too sensitive.

The newest technology in leak detectors offers a level of sensitivity that is unprecedented. Unfortunately, since they’re so sensitive, false alarms are now more likely. That’s why it’s important to know what materials could trigger a false positive. Heated diode sensors can sometimes be triggered by commonly found contaminants such as soap bubbles, cleaning solutions, alcohols, oils, fresh paint, large humidity changes and materials that outgas. If you’re leak checking or cleaning a system, be aware of the presence of these contaminants. Some of the best detectors have adjustable sensitivity levels and detect as little as 0.03 oz/yr (1g/a). Those are pretty small leaks.

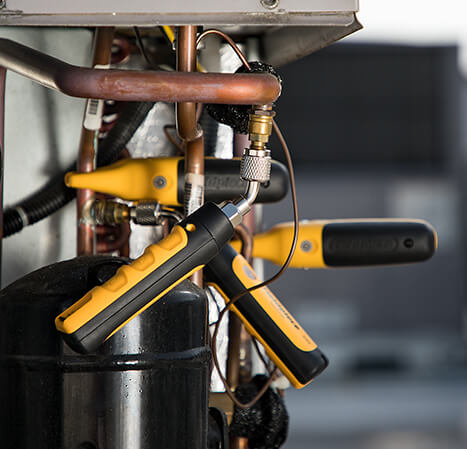
Some sensors don’t last long enough.

If you choose an ultrasonic detector, you’re going to have a long sensor life. And that’s good. However, these detectors are difficult to use and don’t offer the same sensitivity if the system has low pressure. That’s not good. A heated diode detector is popular because it’s easy to use and reliable. However, the diode does not have a fast recovery time between positive tests, and it will degrade the more refrigerant it’s exposed to. Plus, it’s difficult to tell when the detector is losing sensitivity. An infrared detector is a nice middle ground because their sensors can last up to 10 years – even with consistent, heavy use – as sensitivity does not degrade throughout the sensor lifespan. In other words, an infrared sensor should be as sensitive a few years down the road as it was when it was new. Plus, they are less likely to trigger a false positive and have a quick recovery time since their sensors shine light through passing gas and don’t actually contact the refrigerant. This is especially helpful in contaminated atmospheres.

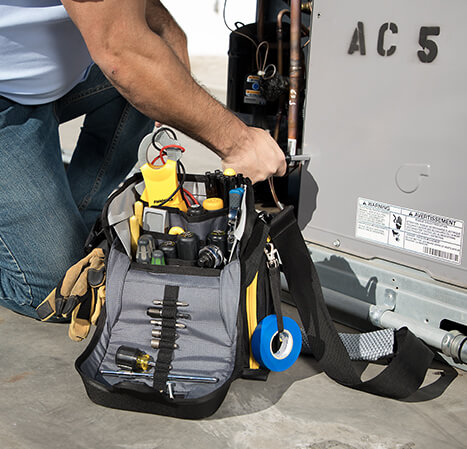
Battery life and durability is dependent on you.

In a leak detector, portability and durability are important factors. How long the battery can last depends greatly on the technology. A long-life rechargeable battery is a great solution for technicians. They quickly recharge and can often be used while recharging. If you want your tool to last, make sure to treat it with care. These are precision instruments after all. That said, newer tools are designed to handle the rigors of life in the field. It’s important to find a leak detector with a hard case for storage when it isn’t in use – because tossing the detector in the bottom of your bag isn’t the ideal storage solution.

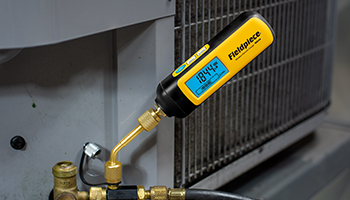
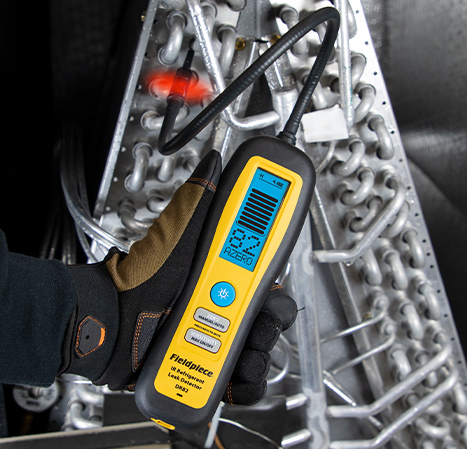
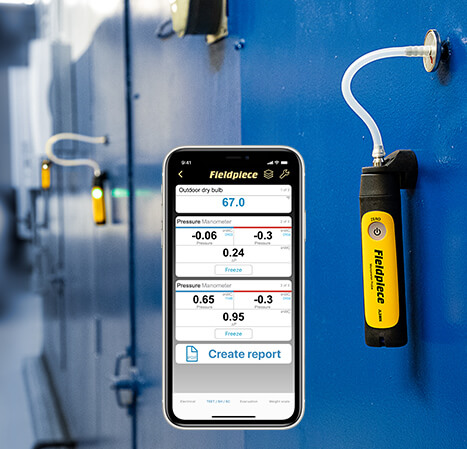
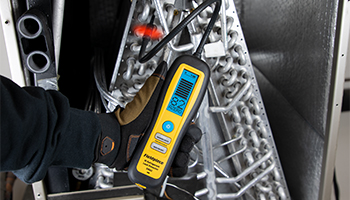
BEEP! BEEP! BEEP! vs. beep. beep. beep.

When your sensor finds refrigerant, how it alerts you is important. Since you use it in locations that could be either indoors or outdoors, or noisy or very dark, make sure to choose a detector that has an audible beep and a screen that is visible in any light condition. Your screen should also show a relative leak size by a numerical value and a bar graph, so you know when you’re close to the exact point of the leak. For more clarity, make sure your tool has a lighted tip so you can clearly see where and what you’re detecting.

Categories
Blog

This Spring and Summer, the Stakes for Cold Storage are Higher than Ever

As an industry, keeping things at proper temperatures is what we do best. We understand the importance of making sure that refrigerators and freezers in restaurants and grocery stores are leak-free and running at optimum efficiency. We also know how important cold storage is at hospitals, pharmacies and research labs.

Today, as the world battles COVID-19, supplies of some vaccines need to be stored at ultra-cold temperatures. To maintain these temperature levels, cold storage systems are working harder than ever. That is why keeping them maintained and knowing when they might be leaking is critical.

Even the smallest leak can have disastrous consequences. In todays’ world, a leak could lead to more than just lost refrigerant. It could lead to lost vaccines, and ultimately lost lives.

Now, as outdoor temperatures start to get warmer, freezers need to work even harder to maintain their ultra-cold temperatures. Especially in critically charged small systems, tiny leaks that went unnoticed in the winter could turn into big problems in the summer when refrigerant runs out and freezers can no longer keep up.

After all, refrigeration equipment can be poorly installed resulting in a high failure rate. Add the impacts of running hard during the hot summer months, and you have a perfect storm. That is why accurate system diagnosis is critical to a healthy, cost-efficient system. Pinhole leaks must be found, fittings must be tightened and every system’s integrity must be maintained.

Fieldpiece’s latest leak detectors boast a level of sensitivity that can find leaks <0.03 oz/yr. Yes, that is a tiny leak. They are sensitive enough to detect the slight changes in concentration that occur in the area around leaks, and trigger on CFC, HFC, HCFC and other common blends. They are also smart enough to not false trigger on moisture or oil. Plus, their flashing, lighted tip can squeeze into tight spaces.

If you are in the business of maintaining commercial freezers that hold precious vaccines, put a Fieldpiece DR82 Infrared Refrigerant Leak Detector in your bag. You’ll do more than save refrigerant. You’ll help us battle COVID-19.

Check out the DR82 Infrared Refrigerant Leak Detector right now.

Categories
Blog

When’s the best time for A/C tune-up? Right now.

Spring has sprung around the country. That means it’s prime time for you to perform maintenance checks on all of your customers’ A/C systems. Annual checks are critical, and if you aren’t already making maintenance calls, you need to start right now.

It makes sense that spring is the best time for this kind of work. It’ll be hot before you know it, and your customers would much rather you visit to service their A/C system on a cool, rainy April morning instead of a sweltering July afternoon. Whether you’re calling on residential or commercial customers, they’ll appreciate that you’re looking out for their comfort.

When you perform spring maintenance, you’ll give your customers assurance that their A/C units are performing at optimum efficiency. After all, systems that run poorly do more than waste energy – they also have shorter lifespans and are prone to breakdowns and costly repairs. That’s not what they want in the middle of August. If your customers want systems that run better and for a longer time, a spring maintenance check should be on their schedule.

Along with replacing air filters, and cleaning the evaporator and condenser coils, a maintenance check can look into the system itself to root out potential problems. Fieldpiece offers a host of diagnostic tools that allow you to quickly assess the health of a system.

Because we only produce HVACR diagnosing and testing equipment, our tools are specifically designed to inspect every component found on A/C systems. These range from SM480V Wireless 4-Port SMAN® Refrigerant Manifolds; to JL3PR Job Link® System Pressure Probes; to JL3PC Job Link® System Pipe Clamps. All of these products offer wireless convenience, industry-defining innovations, and off-the-charts accuracy.

If you’re getting ready to perform some spring maintenance, we offer the widest selection of HVACR tools on the market and everything from Fieldpiece is ideal for service technicians looking to offer best-in-class service repairs and maintenance. You’ll be able to deliver top-notch results, hassle-free, so that you can be a master of the trade.

Categories
Blog

The Fieldpiece Portfolio Keeps Getting Better and Better.

If this continues, we’re going to need a bigger product catalog. At Fieldpiece, our portfolio continues to expand. Whether you want to recover refrigerant lightning fast, pull a complete vacuum with confidence, measure pressures without being tied down by cumbersome hoses or diagnose a complex system without the run-around – we have you covered. Our full range of market-leading tools are designed exclusively with HVACRs in mind. While each instrument we craft is unique, they all have one thing in common: They’re designed to make the work of the HVACR professional easier, faster and better. 

How do we make sure of this? We’re always asking questions of HVACR professionals. We go out in the field and test in real conditions to understand exactly the tools you need to get the job done right. We know the temperature ranges you need to measure, the expectations you need to meet and the conditions you need to work under. When you pick up anything from Fieldpiece, you’re getting something that’s tough, dependable, versatile and functional. A product made just for you. 

This is how we know the features that make your life easier, and the ones that don’t. It’s why many of our products come with a back-lit screen that you can easily read in a dark crawlspace, or why our manometers have a strong magnet that stays right in place on the duct.  

We also know the history of the industry and that “beer can cold” just doesn’t cut it these days. That’s why we developed and invented and patented Rapid Rail™ Sensor Technology for our pipe clamps. This unique technology gives you direct, reliable and almost instantaneous readings – even on wet or damp pipes. We also patented the RunQuick® Oil Change System for our vacuum pumps. It lets you change the oil without turning off the pump or losing vacuum and without making a mess. 

Our innovative portfolio doesn’t stop there. For instance, the SDMN6 manometer was specifically designed with a pressure switch tester so you can quickly diagnose whether a switch is failing—taking guesswork out of the equation. It’s a simple tool, but one that professionals thank us for every day.  

It’s also why our Job Link® System is designed to work with our core Fieldpiece tools while also integrating their functionality seamlessly. We didn’t have to do it this way, but if we didn’t, that wouldn’t make your life easier. 

In the Fieldpiece portfolio, our tools just work. We’ve been in the industry for 30+ years; we understand the business today; and we’ll keep on learning and innovating tomorrow and into the future. 

Why? Because HVACR systems continue to change. In fact, since we started three decades ago, the whole industry has changed — from the refrigerants that keep things cool to the microprocessors that power a system. One thing that hasn’t changed is our commitment to developing the tools you need out in the field. 

That’s why we’ve done more than just keep up. We continue to innovate and change the game to make your job as an HVACR master. Interested in completing your collection of Fieldpiece tools and instruments? You can start right now. 


Categories
Blog

What’s the Big Deal about Split Dual Port Manometers?

As systems get larger and more and more complex, HVACR field service technicians wind up wasting a lot of time and effort to diagnose a problem. We’ve all been there: On the jobsite, you need to check total external static pressure as well as gas pressures at different locations across a system. On commercial jobs in particular, components are often spread across an expansive facility. Plus, in the labyrinth of ducts and pipes, there are typically a few ideal locations where you know you’ll get the accurate measurements you need. You probably aren’t looking forward to snaking a tube across a room, around a bend and down a hall just to compare pressures across zones.

So, you reach into your toolkit and start getting some tools set up in the first of many locations that you’ll need to take readings; but first you’ll probably need to spend five minutes untangling the spaghetti mess of tubing from the last time you had to do this. To everyone in the field, tidy hose management is a goal, but not always a reality.

After you take your first reading, and probably a few others depending on the size of the system, you’ll need to make sure they’re right. To check and see, you’re probably trying to take readings off of awkwardly-placed meters, moving your tools, and taking more readings off of gauges you can barely see – all just to ensure the changes you made worked.

This isn’t the best use of your time or your customer’s money. So, stop! Fieldpiece’s manometers are split port and they’re also wireless. With the JL3KM2 Job Link® System Dual Port Manometer probe kit, your probes don’t need to be connected to each other to work. It makes it easy to set up manometer probes to get your filter pressure drop, coil drop and total external at the same time. There are no hoses to tangle with and you’re free to place your probes wherever you want for the best possible reading. Also, to read each tool, just use the Job Link® App on your mobile device.

You’ll be able to set up many different probes across the system and leave them in place as you run your tests. They’ll wirelessly relay real-time information back to the Job Link® App. Right away, you’ll have a bird’s-eye view of every level and pressure you need. The flexibility of probe placement also makes it much easier to sense duct leaks and air restrictions.

How far is the range? About 1,000 feet! That means these probes can transmit a signal from the top of a building down to the basement, or from way over on the other side of the factory back to the control room. Each probe has a strong magnet, so they’ll attach anywhere and will stay put throughout the test.

No matter where they’re hooked up, you’ll be able to use these innovative manometers to check for airflow restrictions and measure gas pressures. Then, when you’re making changes to the system, you’ll be able to see all of their values changed in real-time on the Job Link App.

Our new manometers are designed to work with as many as eight different probes. This is ideal if you’re measuring in a multi-point application. You can put a couple probes on the system on the roof, a few more on the ducts in the basement, and then you can keep track of everything from one place to quickly diagnose a problem or fine-tune a system. It’s time to end the run-around once and for all.

You’ll be able to work the way you want without scrambling all over hooking-up and disconnecting probes over and over. You’ll save time, money and get accurate real-time information so you can quickly assess the health of the entire system.

Sound interesting? Check out our JL3KM2 Job Link® System Dual Port Manometer today: https://www.fieldpiece.com/product/jl3km2-job-link-system-dual-port-manometer-probe-kit/.


Categories
Tech Articles

Want to Pull a Better Vacuum? Start by Learning How to Correctly Use your Vacuum Gauge.

IT’S ALL ABOUT THE MICRONS.

The vacuum gauge is a vital instrument for any HVACR technician. It helps you read the difference between the atmospheric pressure on the outside and inside of the air conditioning unit. This allows you to diagnose issues with the pressure inside the unit. This is usually the first step to a service you may provide. Here at Fieldpiece, we want to help prepare any HVACR technician for their jobs. If you have more questions about what a vacuum gauge does and how to read one, continue reading to learn more about it. If you have any other questions, be sure to give us a call.

Why we pull vacuums.

If you’re installing a new HVACR system or making repairs, it’s important to remove all moisture and non-condensable gasses before adding any refrigerant. Moisture in the system can turn to acid and freeze, and other non-condensables like nitrogen, air, water or other refrigerants can change the pressure readings in the system. Removing all of these can directly increase the expected life and efficiency of the system. It’s as simple as that.

Why 500 microns?

It takes a deep vacuum of 500 microns or lower to boil off and remove all moisture and non-condensable gasses from a system. Even though microns are small, there’s a massive difference between 500 microns and 1,000 microns. At 1,000 microns, water boils at 1 degree F. While at 500 microns, water boils at -12 degrees F. To make sure the system is ready for refrigerant, you need to make sure the vacuum you pull is deep enough to remove all moisture and non-condensable gasses.

While 500 microns is a popular rule of thumb, each system manufacturer has their recommended pressure for a vacuum and you should definitely check the manual before pulling one.

Small but mighty.

Since a micron is so small, fluctuations in the readings on vacuum gauges are common. We’re measuring differences that are so tiny, that even bumping a gauge or jostling a fitting can cause them to fluctuate. This article should help you better understand the readings on your vacuum gauges and what fluctuations can mean.

PROPER SET UP 101

Choosing the right tools for the job.

A vacuum gauge is the best tool to measure deep vacuum and “see” what’s going on with the system. Slow micron rise indicates moisture still burning off while a faster micron rise indicates a system leak. Digital manifolds may have a built-in, accurate vacuum gauge for convenience but leaky hoses/connections and distance from the system affect readings.

Far, far away.

Place the vacuum gauge where you want the 500 microns to be – on the system! Definitely don’t put it right next to the pump which is producing 20 microns of ultimate vacuum in order to pull the system down to 500 microns quicker. Similarly, you don’t want to install a thermostat right above a register. Best practice is to place the vacuum gauge as far back on the system as you can, as this is the last place to reach 500 microns due to system components and line set bends that create restrictions.

Clear those restrictions.

If you want your vacuum pump to quickly and easily pull your system into a deep vacuum, you need to eliminate any flow restrictions in the system that may slow it down. Sometimes, it might be easier to use a pair of charging hoses to hook up the pump, but vacuum-rated hoses have a larger diameter and that extra room facilitates more flow to pull a vacuum. Also, remove the valve cores from the service ports on the system. Each of these create a restriction that makes your evacuation take significantly longer. To pull the fastest vacuum, you want to have the shortest hose length and the biggest hose diameter.

UNDERSTANDING YOUR READINGS

Fluctuations are normal.

Every time you pull a vacuum, it takes the system a while to equalize to a stable pressure. Your values can and will fluctuate throughout the process – sometimes, these changes can be surprising and make you think you have a leak. However, these varying values are to be expected. After you pull down to 500 microns, wait five minutes to give your system some time to reach an equilibrium. The levels will most likely continue to fluctuate even after you pull the vacuum. This could be due to a host of factors.

Blame the ball-valve.

First, the hose ball-valve that you use to attach your vacuum pump often holds a small amount of gas inside the valve itself. Since vacuum gauges measure tiny amounts of micron change, this small amount of gas in the valve could cause your readings to spike as soon as you close the valve. If you see a slight spike in the pressure when you turn this valve and then the pressure comes back down quickly, it’s normal and not something to be concerned about. To prevent this, periodically open and close the ball valve during evacuation.

Did someone out-gas?

A second reason for the fluctuations could be outgassing. Every hose and O-ring in the system could adjust slightly when you’re pulling a vacuum, and this slight movement could release a bit of gas. Much like the ball-valve that we mentioned above, some gas could be trapped in valves or fittings, and only under a nearly total vacuum will they release this gas. This could cause the readings to fluctuate slightly. Again, this is normal.

Bubbles in your sight glass?

Sometimes, when you’re pulling a vacuum using the Wireless 3-Port or 4-Port SMAN Refrigerant Manifold and Micron Gauge you’ll notice bubbles appearing in the sight glass of the manifold. This could be due to many things and it doesn’t necessarily mean you have a leak. Bubbles can be from the moisture in the system that’s being evaporated. Give it a second and see if the bubbles dissipate. If you’re continuing to pull a vacuum and the bubbles remain, it could mean that you have some leftover oil with moisture in the manifold block. A quick fix is to use rubbing alcohol or RX11 flush to clear the manifold of refrigerant or other contaminants that could be causing the bubbles.

What if there’s too much moisture?

If you’re trying to pull a vacuum and it’s taking much longer than it should, this could be caused by excess contaminants or moisture still in the system that need to be flushed out. The vacuum pump can only do so much. A good way to make sure that your system is clear of excess moisture is to perform a triple evacuation. This involves pulling the vacuum down anywhere between 1,000 to 2,000 microns, then flushing nitrogen into the system to a pressure of 3-5 PSIG for about five minutes, before pulling the vacuum down to 500 microns again. The process should be repeated a third time by pulling a vacuum down to 300 microns, before repeating the nitrogen flushing process; and finally, performing a standing vacuum test for ten minutes with the pump isolated.

Is it a leak?

After you’ve pulled your system to 500 microns, it’s time to close the valves, isolate the system and turn off the pump. This helps you see if the vacuum you pulled is deep enough and if the system holds pressure. As the system equalizes, you’re going to notice slight fluctuations in the microns. How can you tell the difference between the slight adjustments in pressure due to outgassing or other normal fluctuations and those that are actually caused by a leak?

After you isolate the pump, if the micron value increases quickly and never stops until it reaches atmospheric pressure you probably have a leak.

If the pressure slowly increases over time, and eventually levels off higher than 1000 microns. This tells you that you still have some moisture in the system, and you need to turn the pump on again and pull a deeper vacuum.

Therefore, it is imperative to connect your vacuum gauge directly onto the system and isolate at the system. Doing so ensures the reading of the vacuum gauge is not influenced by any potential leaks in hoses or connections in your vacuum set up.