- Merchandise Shop
- Where to Buy
-

 English


 English
Go with the flow.
How did your last HVACR service call go? After arriving at a client location and listening to the symptoms they’re experiencing, what were the first troubleshooting steps you performed? Did you immediately gauge-up and start measuring the system’s refrigerant pressures and temperatures? If so, depending on the symptoms they were noticing, you could have overlooked one of the easiest, fastest and least intrusive tests in your arsenal.
We’re talking about airflow checks. The tests for checking performance and airflow across the evaporator coil are easy, they’re non-intrusive, and they help pinpoint what and where problems exist. Correct airflow is critical to the health and performance of an HVACR system and diagnosing these issues help you better understand the results of other tests.
Three critical performance factors.
When you’re troubleshooting a faulty system, there are three main areas you should check:
1. Electrical
2. Airflow
3. Refrigerant charge
Each of these requires its own unique tests and each one affects the other. However, they all work together to help HVACR techs understand what’s happening within a system.
Depending on the system issues you’re noticing, for many service calls starting with a simple electrical test makes sense. Does the system have power? Does the compressor kick on? Are fans spinning? Is the system kicking out any error codes?
After checking the electrical components of the system, a quick visual inspection is easy and helps you understand the system’s components as well as what may be malfunctioning. These completely non-invasive tests include checking the air filter and looking for debris on or around the condenser.
The next test is to check for performance and correct airflow across the evaporator coil. Some technicians who know about the tools to perform these tests swear by them, while others may have the misperception that checking for proper airflow is difficult and complicated. It all depends on how they were trained. The reality is: Today’s modern innovations make airflow testing a piece of cake.
Checking evaporator coil performance helps you determine how efficiently the system is transferring heat and moving air across the coil. Plus, using the right tools will help indicate what side of the system potential airflow restrictions are located on. It is sort of a no-brainer to start with simple and non-invasive tests – and work your way up to more difficult tests.
By consistently checking airflow every time you troubleshoot a system, you’ll be able to diagnose issues faster and in a less invasive way. Then, if necessary, move on to perform more invasive tests like measuring refrigerant pressures. It just makes sense.
How to keep the air flowing.
HVACR systems depend on air. Air needs to be heated or cooled and then circulated throughout a home or commercial property. That air then returns to the air handling unit. During this cycle, there should be few restrictions to its flow. Inside the unit itself, the air needs to move across the heating or cooling elements at the right speed in order to work at peak efficiency.
Here are three tests to check for performance and correct airflow across the coil:
1. Delta T. There are two easy ways to check for evaporator performance. The first is to calculate the delta T across the evaporator coil by measuring the air temperature entering and exiting the evaporator coil. For cooling, Delta T is calculated by subtracting the supply dry bulb temperature from the return dry bulb temperature. A common rule of thumb for a good delta T is between 18 and 20. This means that the air coming out of a system should be 18 to 20 degrees cooler than it was going in. Check with the system manufacturer to find your system’s ideal delta T. When hooked up correctly, the Fieldpiece Job Link Flex Psychrometers, JL3RH connect to the Job Link® app to perform these calculations automatically.
2. Target Evaporator Exit Temperature (TEET). A second way to check airflow performance is to use the Fieldpiece Job Link® Flex Psychrometers, JL3RH and Job Link® app to calculate the system’s Target Evaporator Exit Temperature or TEET. The difference between Delta T and TEET is that TEET takes into consideration the latent heat used to condense water from the air, while a simple 20° temperature split ignores latent heat. Job Link uses the return air properties to calculate what the supply exiting dry bulb temperature should be based on indoor conditions. Then, compares this value to the actual supply dry bulb temp exiting the evaporator.
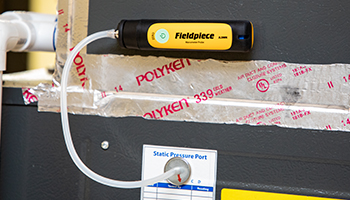
3. Total external static pressure test. Both of the previous tests use temperature measurements to verify optimum heat transfer across the evaporator coil. If, after performing these tests, you find that the delta T is not within range it may be caused by improper airflow or refrigerant charge. To check for airflow restrictions, you should perform a total external static pressure test, or TESP, using the Fieldpiece Job Link Dual Port Manometer Kit. The placement of your manometers varies for different equipment types, so be sure to check for correct placement to measure the static pressures. In general, you need to take a static pressure measurement on the return and supply side of the air handler. This kit is designed to easily and quickly perform this test. Compare this measurement to the manufacturer’s max static pressure value. If the TESP is too high, it indicates there’s an airflow issue. If the test comes back ok, then you can move on to checking for improper refrigerant charge. That’s just one example of the things we learn from measuring airflow.
What causes bad HVACR airflow?
Problems with airflow could be caused by a host of factors. Here are a few of the most common that you might come across and how to fix them.
1. Dirty, clogged filters. Every HVACR system should filter air before it’s recirculated into the home. If the filter is old or very dirty, it could create airflow problems by not allowing the system to draw in enough air to the evaporator. Checking and replacing filters makes a vast improvement in system performance.
2. Leaky ducts. Ductwork that has been damaged could be causing air to flow out of or into the system into attics or crawlspaces. This could make the system waste energy while heating or cooling spaces that it isn’t designed for. These may be quickly repaired with duct tape, or by replacing the defective portion of the ductwork if possible.
3. Improper ductwork installation. Air flows best and most efficiently in straight lines. Each time a system’s ductwork makes a turn, the airflow is disturbed. Not every duct is straight, but excessive twists and turns diminish the performance of the entire system.
4. Malfunctioning dampeners. Make sure to check the position and functionality of dampeners in the ducts throughout the system. Sometimes they get stuck open or closed and don’t move automatically when the system requests. This can cause airflow problems to entire portions of a home or business.
5. Improper fan speed. Fans on most systems are adjustable. If, after repairing ducts and replacing filters, you’re still getting poor airflow numbers, adjust the fan speed to help the system perform more efficiently.
HVACR airflow tools of the trade.
Today’s field technicians have a host of tools to check for evaporator performance and correct airflow. Here are some of the most handy and popular.
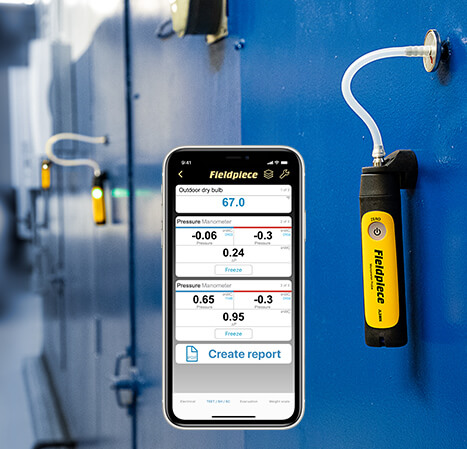
1. Job Link® System Dual Port Manometer Probe Kit, JL3KM2. This versatile tool gives HVACR pros the freedom to work the way they want to and get readings from optimal locations on every system, every time. Short hoses and independent sensors allow for precise placement with untethered freedom. It even allows techs to measure and record up to eight readings at once via the Job Link® app.
2. Fieldpiece Dual Port Manometer, SDMN5. This rugged tool measures gas pressure, static pressure and pressure differentials. Since it has dual ports, it is able to measure both P1 and P2 and quickly show you the difference. This easily informs you whether an air flow restriction is on the supply side or the return side before you embark on deeper explorations of duct work and the like.
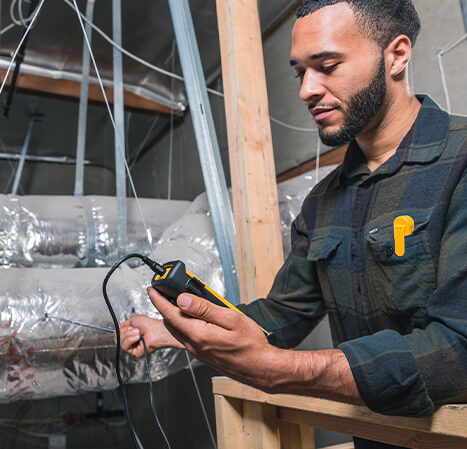
3. Job Link® System Flex Psychrometer Probe, JL3RH. This probe has a flexible wand that fits easily into ducts, plenums, registers or grilles to give you accurate diagnostic information that ranges from the dry bulb and %RH to the wet bulb and enthalpy.
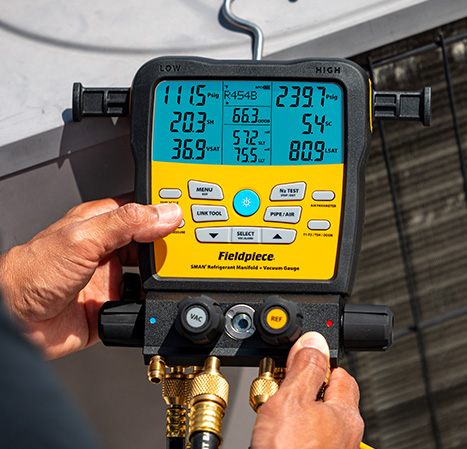
4. Job Link® App. The app wirelessly displays the measurements from all of the Fieldpiece Job Link products you’re already using, and it instantly calculates evaporator delta T, Target Evaporator Exit Temp (TEET) and total external static pressure (TESP). The industry leading 1000’ (LoS) wireless range has you covered even on large job sites. This powerful tool helps techs diagnose and identify potential airflow problems across entire systems.
Airflow is critical.
It’s easy to forget how important airflow is to an efficient HVACR system. The next time you’re on-site troubleshooting an HVACR system, before you gauge-up or perform other tedious and invasive tests, check for evaporator performance and correct airflow. It’s relatively easy to do and it’ll give you a quick snapshot of system performance. You’ll learn how well the system is transferring heat, and you’ll get a better idea of what could be causing the problems.